
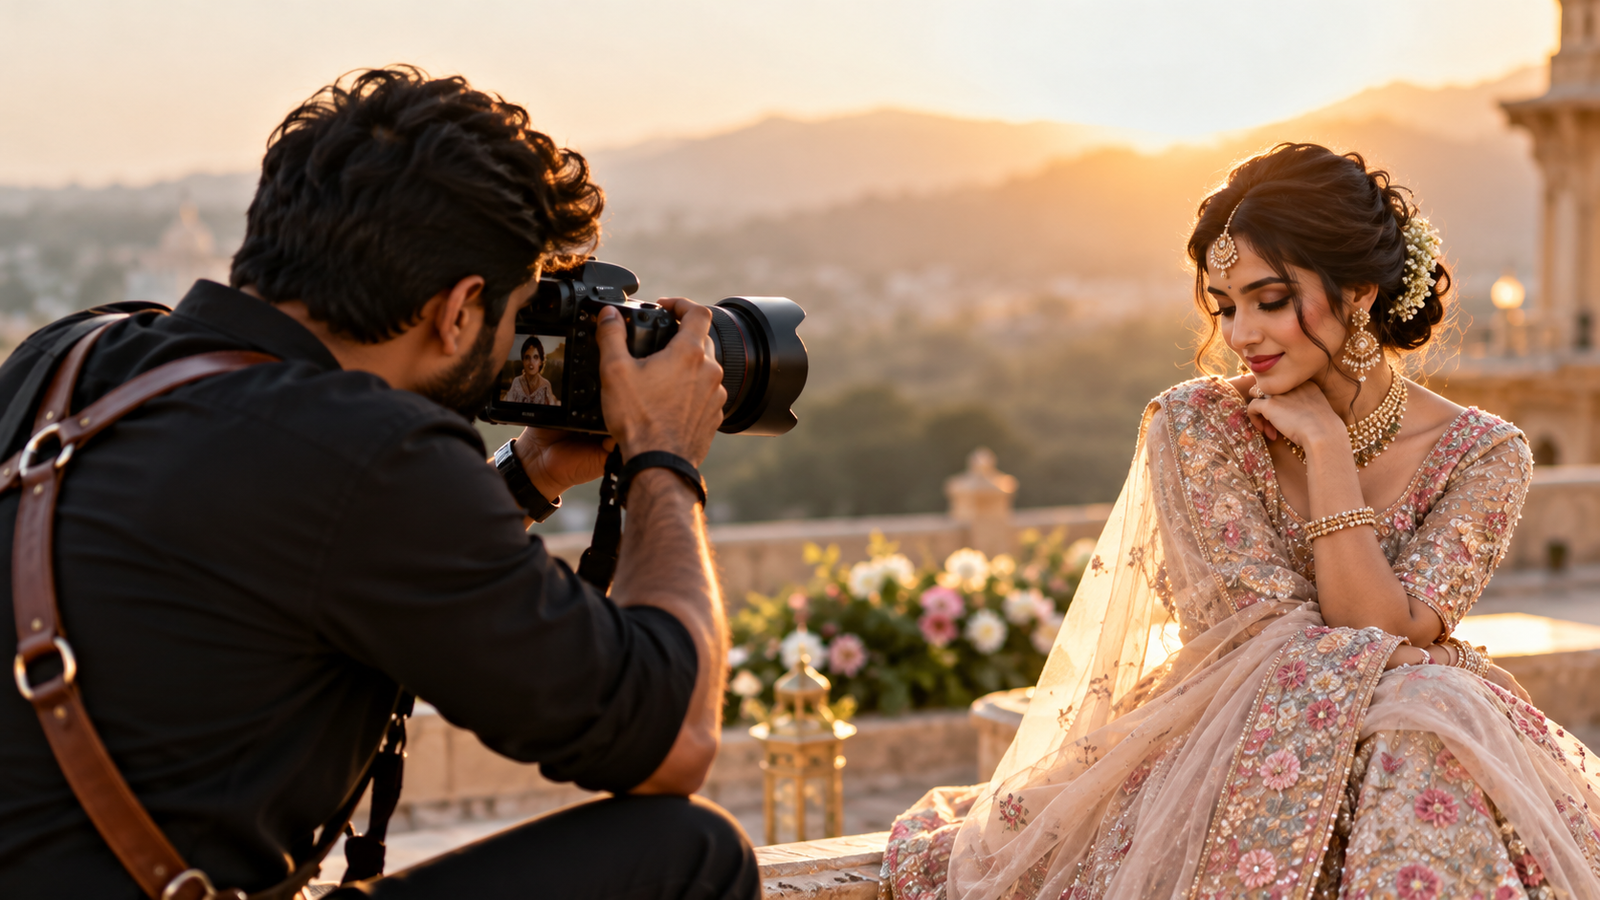
17 Photography Mistakes That Make Your Photos Look Amateur (And How to Fix Them)
You have a good camera. You understand the basics. You take dozens of photographs. Yet sometimes, your images still look ordinary. Why?
You might blame your camera, lens, lighting or editing software.
But here’s something worth considering:
Two photographers can stand in the same location, photograph the same subject with similar equipment, and create completely different results.
One photograph feels intentional, balanced and emotionally engaging.
The other feels like an ordinary snapshot.
The difference is often not the equipment. It is the decisions made before, during and after pressing the shutter.
Professional-looking photography is not defined by expensive gear. It is shaped by the photographer’s ability to control light, composition, timing, focus, colour and visual storytelling.
In this guide, we will explore 17 common photography mistakes that affect beginners and experienced photographers alike.
More importantly, you will learn how to recognise each mistake, understand why it happens and correct it with practical techniques.
Whether you photograph weddings, portraits, wildlife, landscapes, products, architecture or everyday life with a smartphone, these lessons can help you create more intentional photographs.
And near the end, you will find a simple photography self-assessment and a seven-day challenge to put everything into practice.
If you want to strengthen your camera fundamentals before correcting these mistakes, explore our 25 Essential Photography Tips for Beginners and Professionals guide.
Before We Begin: The 10-Second Photography Test
Open the last photograph you took.
Look at it for ten seconds without zooming in.
Now ask yourself:
What is the first thing my eyes notice?
Is the subject immediately clear?
Does the lighting support the subject?
Is anything distracting in the background?
Does this photograph communicate something?
If you struggle to answer these questions, don’t worry.
That is exactly where improvement begins.
The purpose of this exercise is not to judge whether a photograph is beautiful. It is to understand whether your visual decisions are intentional.
Part 1: Composition Mistakes That Weaken Your Photographs
1. Photographing Without a Clear Subject
Imagine a street photograph containing a shop, parked vehicles, pedestrians, advertising boards and colourful buildings.
Everything is visible.
But nothing stands out.
This is one of the most common photography mistakes: including many interesting elements without deciding which one matters most.
A photograph needs a visual point of attention. It does not always need a single person or object, but viewers should have a reason to explore the frame.
Why it happens: Photographers become excited by an interesting scene and try to include everything.
How to fix it:
Before pressing the shutter, complete this sentence:
“This photograph is about ______.”
If the answer is unclear, simplify the composition.
Move closer, change your angle, wait for the right moment or remove unnecessary elements.
Try this exercise: Photograph the same scene three times: first as a wide shot, then a medium shot, and finally a close-up. Compare which photograph communicates the strongest idea.
Key lesson: A clear subject often matters more than a complicated scene.
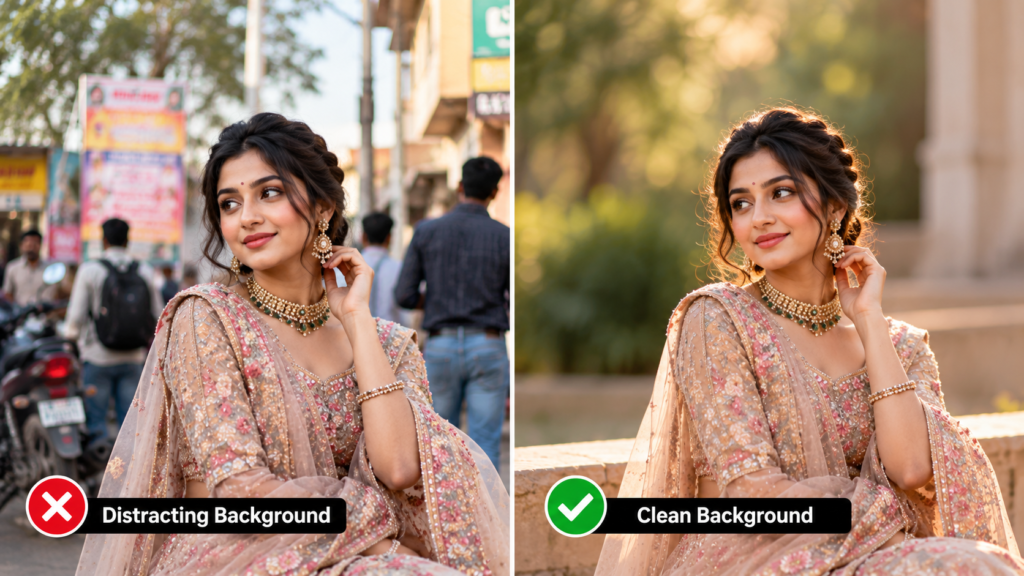
2. Ignoring the Background
You find a beautiful portrait location.
Your subject looks confident, the lighting is attractive, and the pose is perfect.
Then you review the photograph.
A pole appears to grow from the person’s head.
A bright object distracts from the face.
Or a stranger in the background draws more attention than your subject.
These details can weaken an otherwise excellent image.
How to fix it:
Before taking a photograph, scan the four corners of your frame.
Look for:
Bright distractions
Unwanted objects
Awkward lines crossing the subject
Unnecessary people
Cluttered colours or patterns
Sometimes moving only a few steps left or right dramatically improves the composition.
Practical tip: If the background is busy, try increasing the distance between your subject and the background. With suitable focal length and aperture, this may create more separation.
For smartphone photographers, changing your position is often more effective than relying entirely on portrait-mode blur.
3. Always Shooting at Eye Level
Most people naturally photograph from standing eye level.
There is nothing inherently wrong with that perspective.
The problem begins when it becomes your only perspective.
A low camera position can make architecture appear imposing.
A higher perspective can reveal patterns and relationships.
A child’s portrait often feels more personal when photographed near the child’s eye level.
How to fix it:
Before shooting, consider three viewpoints:
Eye level
Low angle
Elevated angle
Choose the perspective that best supports your subject rather than automatically using the most convenient one.
Try this exercise: Photograph an ordinary chair from five different camera positions. You may be surprised by how dramatically its shape and visual impact change.
4. Using the Rule of Thirds Without Understanding Balance
The rule of thirds is a useful starting point.
But placing every subject on a grid intersection does not automatically create a strong photograph.
Sometimes central composition works better.
Sometimes symmetry is more powerful.
Sometimes negative space creates emotion.
Why it happens: Beginners learn composition rules and treat them as mandatory.
How to fix it:
Think about visual balance rather than following a grid mechanically.
Ask whether the surrounding space supports the subject.
For example:
Centre a subject when symmetry is important.
Use negative space to communicate solitude or scale.
Place a moving subject with room in the direction of movement.
Use leading lines when they naturally guide attention.
Key lesson: Composition rules are tools, not restrictions.
5. Cropping Without Intention
An awkward crop can make a portrait feel unfinished.
A hand may be cut off unexpectedly.
A building may lose an important architectural feature.
A product photograph may feel cramped.
Cropping is not about preserving every object in the scene. It is about making deliberate choices.
How to fix it:
Check the frame edges before shooting.
Give important elements enough breathing room, unless a tighter crop is part of your creative intention.
For portraits, pay particular attention to hands, feet, elbows and the top of the head.
Cropping through a joint can sometimes appear awkward, although artistic exceptions exist.
Try this exercise: Create three crops of one photograph: wide, medium and tight. Evaluate how the emotional emphasis changes.
Part 2: Camera Settings and Sharpness Mistakes
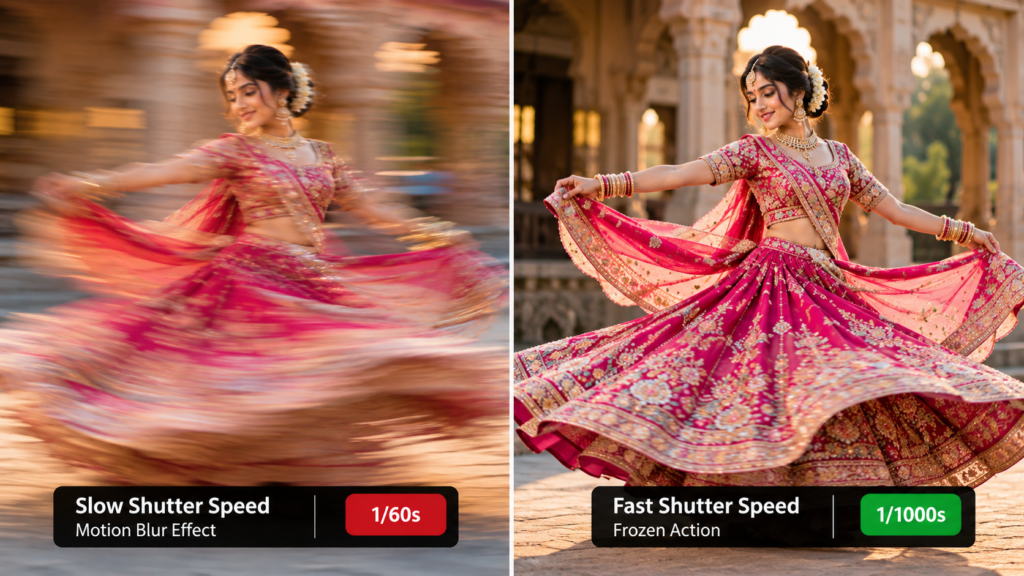
6. Using the Wrong Shutter Speed
A photograph can look soft even when your camera focuses correctly.
The cause may be motion blur.
A moving child, dancing wedding guest or flying bird can move significantly during the exposure.
Camera movement can also blur stationary subjects.
How to fix it:
Choose shutter speed according to the movement you want to capture.
Here are useful starting points—not universal rules:
| Subject | Starting shutter speed |
|---|---|
| Stationary portrait, handheld | Around 1/125s–1/250s |
| Walking person | Around 1/250s–1/500s |
| Dancing or active movement | Around 1/500s–1/1000s |
| Fast sports or wildlife | Around 1/1000s or faster |
| Intentional motion blur | Depends on movement and creative goal |
These ranges depend on focal length, subject speed, camera stability and available light.
A stabilised camera can help reduce blur from camera shake, but it cannot freeze a moving subject.
Try this exercise: Photograph a person walking at 1/60s, 1/250s and 1/500s. Compare the amount of motion blur.
For a deeper understanding of shutter speed, aperture, ISO and other essential camera settings, read our 25 Essential Photography Tips guide.
For a deeper understanding of how shutter speed affects motion blur and sharpness, explore Nikon’s guide to Understanding Shutter Speed.
7. Focusing on the Wrong Part of the Subject
Imagine a portrait where the eyelashes are sharp but the eye itself appears soft.
Or a wildlife photograph where the branch is sharp but the bird is not.
The camera may have focused successfully—just not where you intended.
How to fix it:
For portraits, focus on the eye nearest the camera when that supports the desired depth of field.
For moving subjects, use an appropriate continuous autofocus mode and subject tracking when available.
For still-life or product photography, consider a smaller aperture or focus stacking when additional depth of field is necessary.
Always review critical focus at an appropriate magnification.
Practical reminder: Eye-detection autofocus is helpful, but it is not infallible. Check the results.
8. Choosing Aperture Without Considering Depth of Field
A wide aperture such as f/1.8 can produce attractive background blur.
But it can also leave important parts of the subject out of focus.
For example, when photographing two people standing at different distances from the camera, one face may be sharp while the other is soft.
How to fix it:
Select aperture according to the depth of field required.
A few starting points:
Individual portrait: f/1.8–f/4, depending on distance and lens
Two-person portrait: f/2.8–f/5.6, depending on positioning
Larger group portrait: f/5.6–f/8 or as needed
Landscape: often f/8–f/11, depending on lens and scene
These are illustrative ranges, not fixed requirements.
Depth of field also depends on focal length, focus distance and sensor size.
Key lesson: The widest aperture is not automatically the best aperture.
To understand how aperture and subject distance influence background blur, read Adobe’s guide to Shallow Depth of Field Photography.
9. Being Afraid of High ISO
Many photographers avoid increasing ISO because they fear image noise.
As a result, they choose shutter speeds that are too slow and capture blurry photographs.
But a sharp photograph with some noise is often more useful than a clean photograph ruined by unwanted motion blur.
How to fix it:
Prioritise shutter speed and depth of field according to the subject.
Then use the ISO necessary to achieve a suitable exposure.
Modern cameras and editing tools can often reduce noise effectively, although results vary.
Remember that raising ISO does not create additional light. It changes the camera’s signal amplification and recorded brightness behaviour.
Try this exercise: Photograph the same low-light subject using different combinations of shutter speed and ISO. Compare sharpness and noise at the size you would actually publish.
10. Trusting the Camera’s Exposure Meter Blindly
Your camera’s exposure meter is useful, but it does not understand the artistic intention of every scene.
A bright snowy landscape may appear too dark.
A dark stage performance may appear too bright.
Strong backlighting may leave a face underexposed.
How to fix it:
Review the histogram and highlight warnings when available.
Use exposure compensation in automatic or semi-automatic modes when necessary.
For important scenes, consider the dynamic range and decide whether preserving highlights or shadow detail is more important.
Practical example: When photographing a bride in bright sunlight, watch the highlights in the wedding outfit while ensuring the face remains appropriately exposed.
Part 3: Lighting and Colour Mistakes
11. Thinking More Light Always Means Better Light
Bright light is not necessarily flattering light.
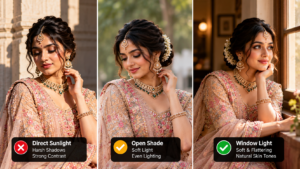
Harsh midday sunlight can create deep eye shadows and strong contrast.
Meanwhile, softer window light may produce a more pleasing portrait.
How to fix it:
Observe three qualities of light:
Direction: Where is the light coming from?
Quality: Are the shadows hard or soft?
Colour: Is the light warm, cool or mixed?
Try moving your subject closer to a window, into open shade or away from direct overhead sunlight.
For outdoor portraits, early morning and late afternoon can provide attractive directional light, but excellent photographs are possible at other times with careful control.
Try this exercise: Photograph the same person in direct sunlight, open shade and window light. Compare skin tones and shadows.
Portrait photographers can apply these lighting techniques to individual and wedding portraits. Explore our Groom Portrait Photography guide for practical portrait ideas.
12. Ignoring Mixed Lighting
Imagine photographing an indoor event illuminated by warm decorative bulbs and cool LED lights.
The result may contain inconsistent skin tones and strange colour casts.
This can be especially challenging at weddings, concerts, restaurants and indoor events.
How to fix it:
Identify the dominant light source.
Where practical, position the subject away from conflicting lights.
Use a suitable white balance setting and consider shooting RAW when your equipment supports it.
For critical colour work, a grey card or colour reference can help establish a consistent starting point.
Key lesson: Correct white balance cannot always fully remove the effects of several differently coloured light sources illuminating the same subject.
13. Overediting Photographs
Editing should support the photograph.
But excessive sharpening, saturation, skin smoothing, contrast or artificial blur can make an image look unnatural.
This is especially noticeable in portraits.
Skin may lose its texture.
Colours may become unrealistic.
Bright areas may lose detail.
How to fix it:
Begin with exposure, white balance, tone and composition.
Then make selective adjustments only where needed.
Compare the edited photograph with the original.
Ask yourself:
“Does this edit strengthen the image, or am I adding effects simply because the software allows them?”
Try this exercise: Edit one photograph twice—once dramatically and once conservatively. Leave both for a few hours, then compare them on a calibrated or reasonably accurate display.
The best version depends on your artistic goal, but the exercise will help you recognise unnecessary processing.
Part 4: Storytelling and Creative Mistakes
14. Taking Photographs Without Anticipating the Moment
Some of the most memorable photographs happen in a fraction of a second.
A child laughing.
A bird taking flight.
A bride reacting to a surprise.
A street performer turning toward the light.
If you wait until the moment has happened before raising your camera, you may miss it.
How to fix it:
Learn to anticipate behaviour.
Observe patterns.
At a wedding, understand the ritual sequence.
In wildlife photography, study animal behaviour.
In street photography, watch how people move through a scene.
Prepare your framing and exposure before the decisive moment.
Try this exercise: Choose a safe public scene and observe it for two minutes before taking a photograph. Predict where the next interesting interaction may occur.
This develops timing rather than encouraging random continuous shooting.
15. Photographing Only the Obvious Moment
A wedding photographer captures the couple exchanging garlands.
A travel photographer captures the famous monument.
A sports photographer captures the winning celebration.
These are important photographs.
But the strongest story may also exist around the main event.
The nervous expression before the ceremony.These spontaneous expressions are central to Candid Wedding Photography, where genuine reactions and unplanned moments become part of the visual story.
The craftsperson preparing decorations.
The athlete recovering after the race.
The quiet street beside the tourist attraction.
How to fix it:
Build visual stories using three kinds of photographs:
Establishing shot: Shows the setting.
Action or portrait shot: Shows the main subject or event.
Detail or reaction shot: Adds context, emotion or meaning.
This approach works across wedding, documentary, travel, event and commercial photography.
Key lesson: A complete story often requires more than one impressive image.
16. Copying Popular Photography Trends Without Developing Your Own Vision
Social media provides endless inspiration.
But it can also encourage photographers to repeat the same poses, locations, colour grades and compositions.
There is nothing wrong with learning from other photographers.
The problem begins when imitation replaces observation.
How to fix it:
Instead of copying the final photograph, study the underlying technique.
Ask:
Why does the lighting work?
What makes the composition balanced?
How was the subject directed?
What emotion does the image communicate?
How could I apply the same principle differently?
Try this exercise: Choose one inspiring photograph and identify three techniques behind it. Create a new photograph using those techniques with a different subject, location or visual story.
Your objective is not to reproduce the image. It is to understand the thinking behind it.
17. Never Reviewing Your Own Work Critically
This may be the most expensive photography mistake—not in money, but in lost opportunities to improve.
Photographers often spend hours taking and editing pictures but very little time analysing their mistakes.
They publish their strongest images and forget the rest.
As a result, the same problems continue.
How to fix it:
After every important shoot, select:
Your three strongest photographs
Three photographs that almost worked
Three photographs that failed technically or creatively
For each unsuccessful image, identify the primary cause.
Was it timing?
Focus?
Lighting?
Composition?
Communication?
Then write one change you will make during your next shoot.
Professional habit: Keep a small photography improvement journal. Over time, repeated problems become easier to identify and correct.
Photography Troubleshooting: Find the Problem in 30 Seconds
Use this table when a photograph does not look the way you expected.
| What you notice | Possible cause | First thing to try |
|---|---|---|
| Moving subject looks blurry | Shutter speed too slow | Increase shutter speed |
| Background is sharp, subject is not | Incorrect focus target | Change focus area or tracking |
| Group photo has soft faces | Insufficient depth of field | Adjust aperture and positioning |
| Subject blends into background | Weak separation | Change angle, distance or lighting |
| Skin colours look unnatural | Mixed light or white balance | Identify dominant light source |
| Bright dress loses detail | Clipped highlights | Adjust exposure and review histogram |
| Photo looks visually cluttered | Too many competing elements | Simplify composition |
| Portrait looks artificial | Excessive retouching | Reduce processing |
| Photo feels boring | Weak timing or subject emphasis | Look for gesture, emotion or context |
| Series feels repetitive | Limited shot variety | Capture wide, medium and detail images |
This table identifies likely causes, not guaranteed diagnoses. Several factors may contribute to the same visual problem.
Test Your Photography Skills: A Five-Question Self-Assessment
Before moving on, evaluate how you approach photography.
Question 1: Before taking a photograph, do you consciously identify the main subject?
Question 2: Do you check the background and frame edges before shooting?
Question 3: Can you explain why you selected a particular shutter speed and aperture?
Question 4: Do you adjust your approach based on the direction and quality of light?
Question 5: After a shoot, do you review unsuccessful photographs to understand what went wrong?
Give yourself one point for every question you can confidently answer “yes.”
Your result
0–1 points: Building awareness
Concentrate on subject selection, basic exposure and simple compositions.
2–3 points: Developing consistency
You understand several fundamentals. Work on making your decisions more deliberate.
4 points: Strong working habits
Focus on improving consistency across difficult subjects and lighting conditions.
5 points: Intentional practice
You have useful habits in place. Challenge yourself with unfamiliar situations and more demanding visual stories.
This is an informal learning exercise, not a professional certification or objective measure of photographic skill.
The Seven-Day Photography Improvement Challenge
You do not need to buy new equipment for this challenge.
Use your DSLR, mirrorless camera, compact camera or smartphone.
| Day | Challenge | Your goal |
|---|---|---|
| Day 1 | Photograph one subject from five angles | Understand perspective |
| Day 2 | Create three images with clean backgrounds | Improve subject separation |
| Day 3 | Photograph movement at different shutter speeds | Understand motion |
| Day 4 | Photograph the same subject in three lighting conditions | Recognise light quality |
| Day 5 | Create a three-photo visual story | Develop storytelling |
| Day 6 | Edit one image in two different ways | Improve editing judgement |
| Day 7 | Review 20 recent photographs | Identify recurring mistakes |
On Day 7, write down the three mistakes you encounter most frequently.
These become your priorities for the next month.
The objective is not to take more photographs. It is to make more thoughtful decisions.
If you want to continue developing your technical and creative skills, explore Adobe’s Photography Basics learning resources for additional lessons and exercises.
What Makes a Photograph Look Professional?
A professional-looking photograph is not necessarily the sharpest, most colourful or most heavily edited image.
Technical quality matters, especially when an assignment demands reliable results.
But technical perfection alone does not guarantee emotional impact.
A photograph can be slightly imperfect and still communicate a powerful story.
Likewise, an image can be technically flawless and visually forgettable.
Strong photography often combines five qualities:
Intention: The photographer knows what the image is meant to communicate.
Control: Exposure, focus, timing and composition support that intention.
Observation: The photographer notices light, behaviour and background details.
Consistency: The photographer can achieve reliable results across different situations.
Storytelling: The photograph offers a reason for the viewer to care.
These qualities apply to nearly every photography genre.
Do You Need an Expensive Camera to Improve?
No.
A better camera can provide useful capabilities, such as improved autofocus, higher dynamic range, interchangeable lenses or stronger low-light performance.
But equipment cannot automatically choose a compelling subject, recognise a meaningful moment or create a balanced composition.
If your current camera meets your practical needs, improving technique may provide more immediate value than buying additional gear.
Upgrade equipment when you can identify a specific limitation that prevents you from achieving your intended results.
How These Photography Lessons Apply to Different Genres
Wedding Photography
Prioritise anticipation, family reactions, mixed-light handling and reliable focus during important rituals.
For real-world applications of these techniques during Indian wedding celebrations, explore our Wedding Photography in Vadodara guide.
Explore our Candid Wedding Photography and Wedding Photography in Vadodara guides for more specialised examples.
Portrait Photography
Concentrate on eye focus, flattering light, background separation and natural posing.
Our Groom Portrait Photography guide offers additional portrait-focused ideas.
Wildlife Photography
Pay attention to shutter speed, autofocus tracking, animal behaviour and the direction of light. Respect wildlife and maintain a safe distance.
Landscape Photography
Work on composition, foreground interest, highlight control, depth of field and changing weather conditions.
Street Photography
Practise observation, timing, layering and visual storytelling while respecting local laws and personal privacy.
Product Photography
Focus on consistent lighting, accurate colour, clean backgrounds, reflections and sufficient depth of field.
Smartphone Photography
Start with lens cleanliness, intentional framing, exposure control, stable camera handling and restrained editing.
You can practise most of the lessons in this guide without specialised equipment.
Frequently Asked Questions About Photography Mistakes
What are the most common photography mistakes?
Common photography mistakes include poor focus, inappropriate shutter speed, distracting backgrounds, weak subject selection, uncontrolled lighting, incorrect exposure and excessive editing.
Why do my photographs look amateur even with a good camera?
A capable camera cannot replace intentional composition, timing, light control and storytelling. Review your photographs to identify which decisions are weakening the final result.
How can beginners improve photography quickly?
Practise one technique at a time. Start with composition, background awareness, exposure and focus. Review your results and repeat the exercise under different conditions.
What camera settings should I learn first?
Understand shutter speed, aperture, ISO, focus modes and exposure compensation. Learn how each affects the photograph rather than memorising a single set of settings.
Can smartphone photography look professional?
Yes, smartphones can produce excellent photographs, particularly in suitable lighting. Their limitations vary by device and shooting conditions, but strong composition and timing remain valuable regardless of equipment.
Is editing necessary for good photography?
Editing can improve tone, colour, framing and consistency, but a strong photograph begins with thoughtful capture. The amount of editing required depends on the subject and intended visual style.
How do I know whether my photography is improving?
Compare work from different months, review recurring technical errors, evaluate consistency and seek constructive feedback. Measure progress by the problems you can now solve reliably.
How can I develop my own photography style?
Study different photographers, experiment with light and composition, identify subjects you enjoy and review patterns in your strongest work. A recognisable style usually develops through sustained practice rather than a single preset.
Final Thoughts: Better Photography Begins Before You Press the Shutter
The biggest photography improvement rarely comes from discovering one secret camera setting.
It comes from learning to notice what other people overlook.
The background behind your subject.
The direction of light.
The expression that appears for only a moment.
The difference between a technically correct photograph and one that communicates a meaningful story.
Every photographer makes mistakes.
Beginners make them while learning the fundamentals.
Experienced photographers make them when working under pressure, adapting to unfamiliar situations or experimenting creatively.
What separates continued improvement from repeated frustration is the willingness to recognise those mistakes and learn from them.
Here is your final challenge:
Choose one photograph you are not satisfied with.
Do not delete it immediately.
Study it.
Identify one thing you could have done differently.
Then take another photograph applying that lesson.
That simple habit may teach you more than collecting hundreds of photography tips without practising them.
Great photography is not about never making mistakes. It is about learning to make better decisions, one frame at a time.
Wedding Album Designing India shares practical photography knowledge alongside wedding, candid and portrait photography work. Explore our photography guides and portfolio for more inspiration and examples.