
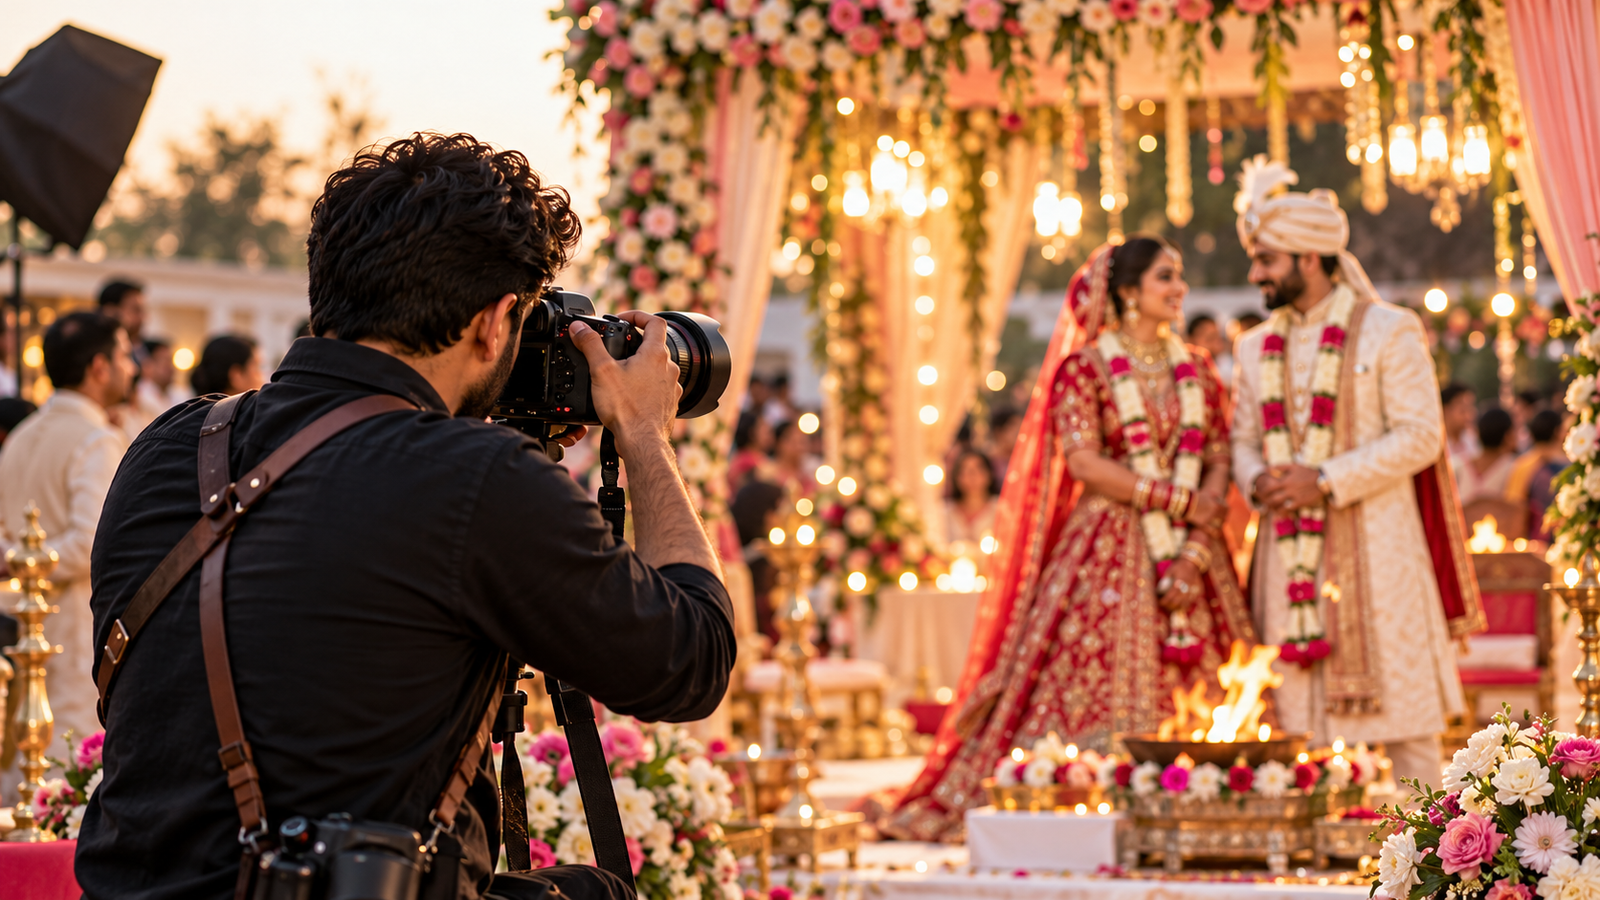
Photography is more than owning an expensive camera or choosing the perfect location. It is the ability to understand light, recognise meaningful moments, compose an image and make technical decisions before an opportunity disappears.
Whether you are a beginner learning manual camera settings, a portrait photographer working with natural light, or a wedding photographer covering an important ceremony, the fundamentals remain surprisingly similar.
You need to understand exposure, focus, movement, composition, colour and storytelling.
But knowing these concepts is not enough. The real challenge is applying them when conditions are less than perfect.
What happens when your subject moves unexpectedly? How do you photograph people in harsh sunlight? Why do indoor photographs look yellow? What should you do when a wedding venue has extremely low lighting?
This complete guide covers 25 essential photography tips with practical techniques, camera-setting examples, common mistakes and professional workflow recommendations.
We will also explore how these techniques apply to wedding photography, pre-wedding shoots, candid portraits and real photography assignments in Vadodara, Gujarat.
Whether photography is your hobby or your profession, these lessons will help you develop a more confident and consistent approach.
Quick Photography Settings Cheat Sheet
Before exploring individual techniques, here is a practical reference for common photography situations.
| Photography situation | Shutter speed | Aperture | ISO |
|---|---|---|---|
| Outdoor portraits | 1/250 sec or faster | f/1.8–f/4 | 100–400 |
| Indoor portraits | 1/125–1/250 sec | f/1.8–f/2.8 | 400–3200+ |
| Moving subjects | 1/500–1/1000 sec | f/2.8–f/5.6 | As required |
| Family group portraits | 1/160–1/250 sec | f/4–f/8 | As required |
| Wedding ceremony | 1/125–1/250 sec | f/2–f/4 | As required |
| Landscape photography | Depends on support and movement | f/8–f/11 | 100–400 |
| Sangeet dance photography | 1/250–1/500 sec or faster | f/1.8–f/2.8 | As required |
These values are starting points, not fixed rules. Actual settings depend on the available light, subject movement, focal length, equipment and creative intention.
Part 1: Master Your Camera Settings
1. Understand the Exposure Triangle
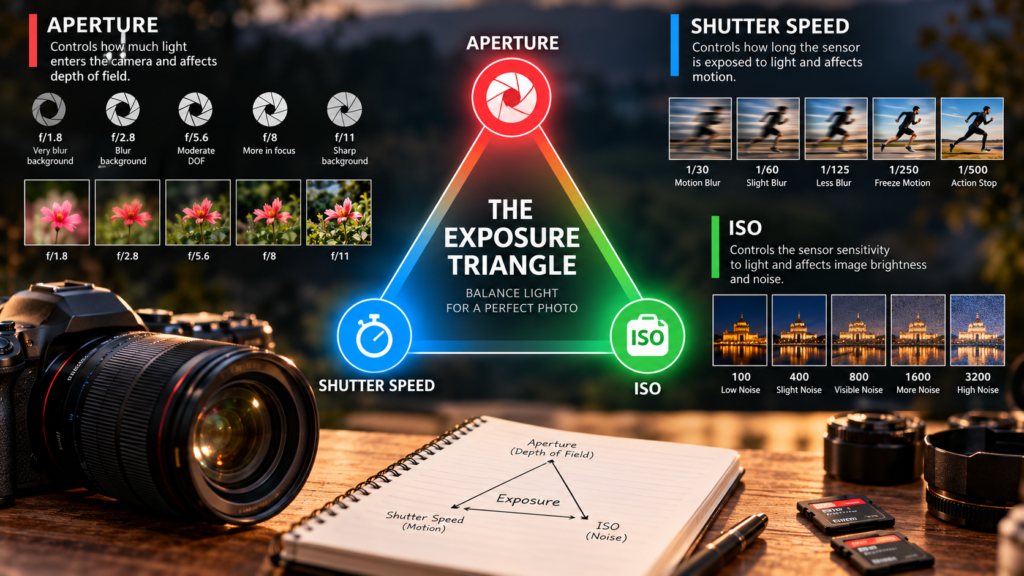
One of the most important photography tips for beginners is understanding the relationship between aperture, shutter speed and ISO.
These three settings influence exposure, but each also affects image quality or appearance.
Aperture controls the size of the lens opening. A wide aperture, such as f/1.8, allows more light to reach the sensor and can produce a shallow depth of field.
Shutter speed controls how long the sensor receives light. Faster shutter speeds help freeze movement, while slower speeds can introduce intentional motion blur.
ISO controls the camera’s sensitivity setting or amplification of the recorded signal. Increasing ISO can help produce a usable exposure in low light, although noise and dynamic-range limitations may become more noticeable.
Practical Example
Imagine photographing a bride near a window.
You might begin with:
Aperture: f/2.8
Shutter speed: 1/250 second
ISO: 400
If the image is too dark, you could increase ISO, widen the aperture or adjust the lighting.
However, reducing shutter speed too far may introduce motion blur.
Professional tip: Choose the settings that protect the most important aspect of the photograph. For moving subjects, shutter speed often deserves priority.
2. Learn When to Use Manual Mode
Manual mode gives photographers direct control over aperture, shutter speed and ISO.
However, professional photography does not require manual mode for every situation.
Aperture Priority can be useful when photographing portraits under changing natural light.
Shutter Priority can help when movement is the main concern.
Manual exposure is particularly helpful when lighting remains relatively consistent and automatic metering would produce unnecessary variations.
When Manual Mode Works Well
Controlled indoor portraits
Studio photography
Consistently lit wedding stages
Product photography
Scenes with difficult or misleading metering
For unpredictable outdoor conditions, Auto ISO combined with manual aperture and shutter speed can also be effective.
The goal is not to prove that you can operate every setting manually. The goal is to control the final photograph.
3. Choose the Correct Shutter Speed
A photograph can be correctly exposed but still look disappointing because the subject is blurred.
This often happens when the shutter speed is too slow.
For a relatively still portrait, 1/125 second may be sufficient under suitable conditions.
For people walking, try approximately 1/250 second.
For energetic dance performances, 1/500 second or faster may be necessary.
The required speed also depends on focal length, camera stability and the direction of movement.
Common Mistake
Photographers sometimes rely entirely on image stabilisation.
Stabilisation can reduce blur caused by camera movement, but it does not freeze a moving subject.
Remember: If your subject is moving, increasing shutter speed is often the first adjustment to consider.
4. Use Aperture Creatively
Aperture influences depth of field.
A wide aperture can separate a person from a distracting background.
A narrower aperture can help keep multiple people or important environmental details sharp.
For individual portraits, f/1.8–f/2.8 can create attractive subject separation.
For family photographs, f/4–f/8 may be more appropriate depending on group arrangement and distance.
For landscapes, f/8–f/11 is often a useful starting range, although the optimal setting varies by lens.
Professional Tip
Avoid shooting every portrait at the widest available aperture.
When photographing couples, an extremely shallow depth of field can leave one person’s eyes sharp while the other person’s face is noticeably soft.
Select aperture based on the photograph, not simply the lens specification.
5. Understand ISO Without Being Afraid of It
Many beginners believe that ISO should always remain at 100.
That is not practical for every photography situation.
At a dimly lit wedding ceremony, increasing ISO may be necessary to preserve a fast enough shutter speed.
A sharp photograph with some noise is often more useful than a clean but severely blurred photograph.
Modern noise-reduction tools can help, although they cannot restore every lost detail.
Practical Advice
Expose carefully, avoid unnecessary underexposure and learn how your specific camera performs at higher ISO settings.
There is no universal maximum ISO suitable for every camera.
Part 2: Improve Focus, Sharpness and Composition
6. Master Autofocus Before Important Assignments
Accurate autofocus is essential for portraits, weddings and moving subjects.
For stationary subjects, single autofocus can work well.
For moving subjects, continuous autofocus is usually more appropriate.
Modern cameras may offer face and eye detection, but these systems can still struggle with obstructions, low contrast or difficult lighting.
Wedding Photography Example
During a bride’s entrance, the camera may accidentally focus on decorative flowers or guests standing in the foreground.
Before the entrance begins, select an appropriate autofocus mode and tracking area.
Test the system under similar lighting.
Do not wait until the important moment to discover that the camera is tracking the wrong subject.
7. Learn the Rule of Thirds — Then Go Beyond It
The rule of thirds is one of the most familiar photography composition techniques.
Imagine dividing your frame into nine equal sections using two horizontal and two vertical lines.
Placing important subjects near these lines or intersections can create balanced compositions.
However, this is not a rule that must always be followed.
Symmetry can be powerful in architectural photography.
Central composition can work beautifully for formal portraits.
Negative space can create an elegant editorial look.
Practical Exercise
Photograph the same subject using three compositions:
Centred composition
Rule of thirds
Strong negative space
Compare how the visual mood changes.
The strongest composition is the one that supports your subject and intended story.
8. Use Leading Lines and Natural Framing
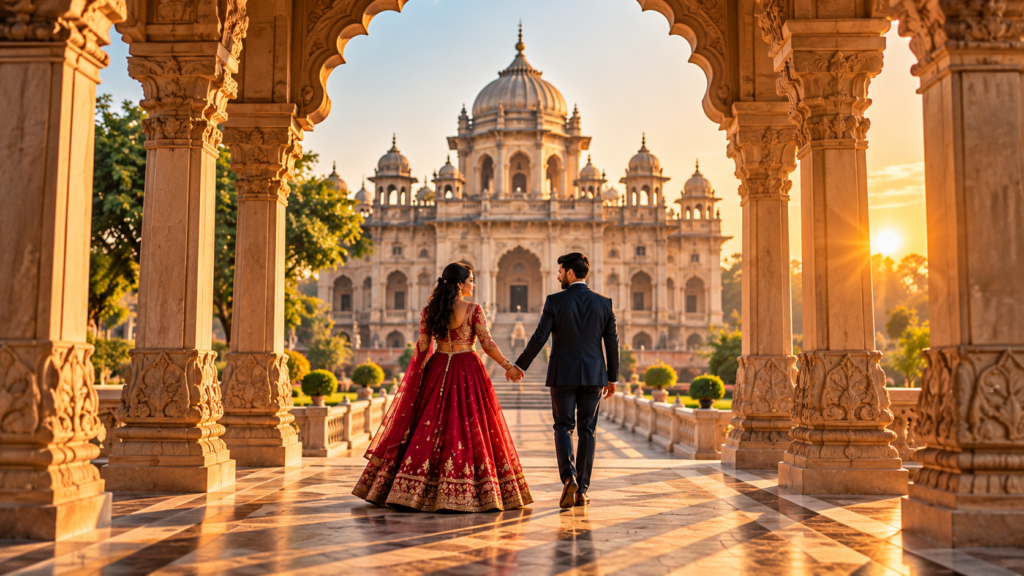
Leading lines help direct attention through a photograph.
Roads, corridors, staircases, pathways and architectural elements can all guide the viewer toward the subject.
Natural framing uses elements such as doorways, arches, trees or windows to create a visual boundary around the subject.
Vadodara Photography Example
Heritage architecture and traditional streets in Vadodara can offer interesting lines, textures and framing opportunities.
Instead of placing a couple directly in front of a building, explore how its architecture can become part of the composition.
Always respect access restrictions and obtain permission where required.
Related article: Best Pre Wedding Shoot Locations in Vadodara.
9. Pay Attention to the Background
A beautiful subject does not automatically create a beautiful photograph.
Distracting backgrounds can reduce the impact of an otherwise excellent portrait.
Before pressing the shutter, inspect the entire frame.
Look for objects appearing to emerge from the subject’s head, bright distractions, clutter and unwanted people.
Sometimes moving just one or two steps can improve the photograph significantly.
Professional Tip
Background selection is often more effective than trying to remove distractions during editing.
Good photography begins before the image reaches Photoshop or Lightroom.
10. Create Sharp Images Without Overprocessing
Sharpness depends on more than camera resolution.
Autofocus accuracy, lens performance, shutter speed, subject movement and editing all influence perceived sharpness.
Excessive sharpening can introduce halos and unnatural textures.
How to Improve Sharpness
Use an appropriate shutter speed.
Focus accurately on the most important area.
Keep lenses clean.
Avoid unnecessary camera shake.
Apply moderate sharpening during editing.
For portraits, preserve natural skin texture rather than sharpening every detail aggressively.
Part 3: Understand Photography Lighting
11. Learn to Recognise Good Natural Light
Natural light is one of the most valuable tools available to photographers.
However, not all daylight produces the same results.
Soft light generally creates gradual transitions between highlights and shadows.
Hard light produces stronger contrast and more defined shadows.
Neither is automatically better.
Soft light is often flattering for portraits.
Hard light can create dramatic editorial photographs when used intentionally.
Practical Exercise
Photograph the same person near a window, in open shade and under direct sunlight.
Observe how the shadows and skin tones change.
This exercise can teach more about lighting than memorising camera settings alone.
12. Use Golden Hour Effectively
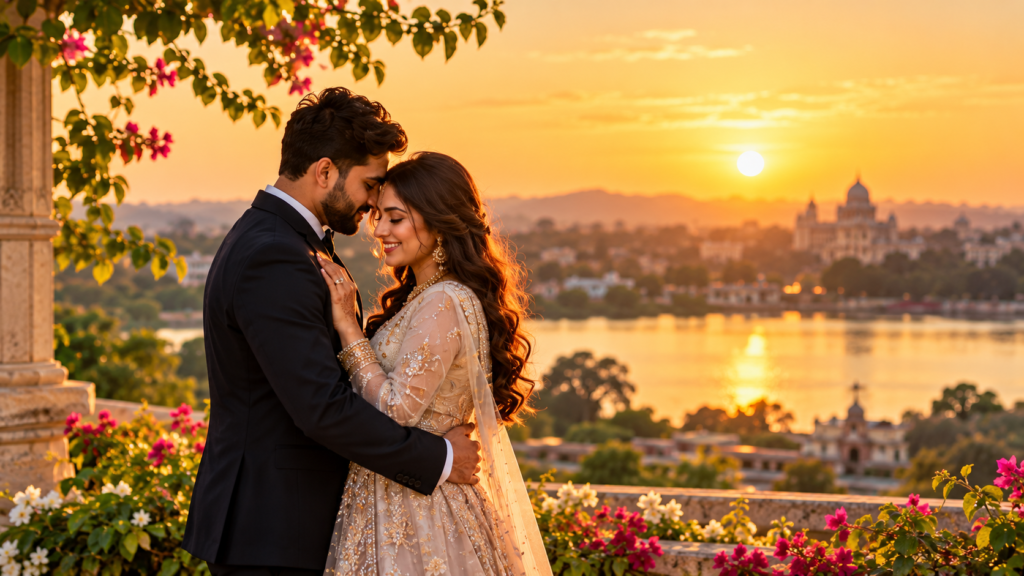
Golden hour refers to the period shortly after sunrise or before sunset when sunlight is relatively low in the sky.
It can create warm tones, long shadows and attractive backlighting.
For pre-wedding photography, golden hour can be particularly useful.
However, the duration and appearance of golden hour vary with season, location and weather.
Practical Tips
Arrive early.
Plan the most important photographs before the light disappears.
Expose carefully when shooting toward the sun.
Use a reflector or controlled fill light if faces become too dark.
Avoid relying on golden hour as the only opportunity for good photographs.
Related article: Top 10 Best Pre Wedding Shoot Locations in India.
13. Handle Harsh Midday Sunlight
Outdoor photography does not always happen at ideal times.
Wedding schedules may require portraits during the middle of the day.
Harsh sunlight can create deep shadows beneath the eyes and bright highlights on skin.
Solutions
Look for open shade.
Adjust the subject’s position.
Use a diffuser or reflector when practical.
Consider controlled fill flash.
Pay attention to the direction of light rather than simply increasing exposure.
For wedding photographers working in Vadodara, managing strong afternoon sunlight is an important practical skill.
14. Understand Flash Photography
Flash can be extremely useful in low-light environments.
However, direct flash is not always the most flattering option.
When suitable surfaces are available, bouncing flash can create softer-looking illumination.
Modifiers can also help control light distribution.
Important Considerations
Check whether flash photography is permitted.
Avoid interrupting important ceremonies.
Be aware of reflective surfaces.
Balance flash exposure with ambient light.
Practise before accepting assignments where flash will be essential.
The best flash photographs often look natural because the photographer has carefully controlled both artificial and existing light.
15. Control White Balance and Skin Tones
Accurate skin tones are especially important in portrait and wedding photography.
Mixed lighting can create unwanted colour casts.
For example, a wedding venue may contain warm decorative lights, daylight from windows and coloured stage lighting.
Automatic white balance may respond differently as the camera moves between these sources.
Solutions
Shoot RAW.
Use a consistent white balance when lighting is stable.
Use a grey card or colour reference for controlled sessions.
Adjust individual photographs when lighting conditions change.
Avoid applying the same colour preset to every photograph without checking skin tones.
Natural-looking skin is generally more important than forcing every image into an identical colour grade.
Part 4: Portrait and Wedding Photography Tips
16. Help People Feel Comfortable in Front of the Camera
Many people feel nervous when being photographed.
This is particularly common during pre-wedding sessions or formal wedding portraits.
A photographer’s communication skills can be just as important as technical knowledge.
Better Approach
Begin with simple instructions.
Encourage natural movement.
Give clear feedback.
Avoid complicated posing directions.
Allow the subject time to relax.
Instead of repeatedly asking a couple to smile, encourage an interaction that creates a genuine expression.
Good portrait photography is a collaboration between the photographer and the person being photographed.
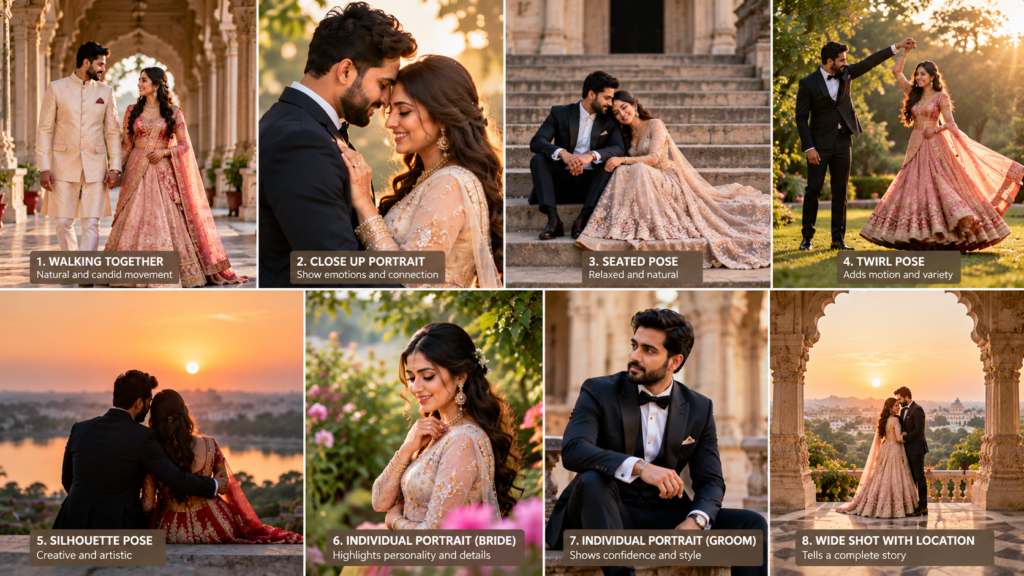
17. Avoid Repeating the Same Couple Poses
A common problem in pre-wedding photography is visual repetition.
The couple walks toward the camera.
They hold hands.
They look at each other.
Then the same poses appear again at another location.
This can make an entire album feel predictable.
How to Create Variety
Change the distance between the subjects.
Experiment with seated and standing compositions.
Use movement, reflections and silhouettes.
Include individual portraits.
Capture environmental photographs.
Photograph spontaneous interactions between planned portraits.
A strong couple photography collection should contain variety in composition, emotion and visual perspective.
18. Capture Genuine Candid Moments
Candid photography is not simply taking photographs when someone is unaware of the camera.
It involves anticipation.
A skilled candid photographer learns to recognise situations where meaningful expressions may develop.
During a wedding, watch the interactions between family members.
Observe reactions during speeches.
Look beyond the stage.
Pay attention to quieter moments before and after ceremonies.
Professional Tip
Position yourself thoughtfully and allow moments to unfold.
Constantly directing people can make genuine interactions more difficult to capture.
For a deeper explanation of emotional storytelling, explore our Candid Wedding Photography guide.
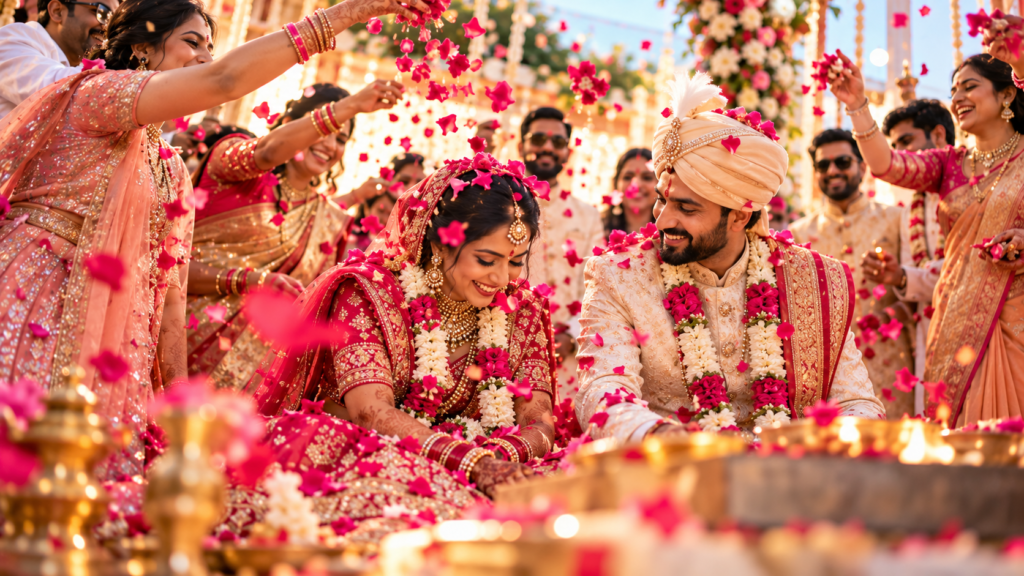
19. Photograph the Complete Wedding Story
Wedding photography should not focus exclusively on the bride and groom.
Family members, rituals, decorations, preparations and small interactions all contribute to the story.
A complete wedding gallery should include:
Getting-ready moments
Individual bride and groom portraits
Family photographs
Important ceremonies
Candid interactions
Venue and decoration details
Couple portraits
Reception and celebration photographs
The exact coverage should reflect the client’s agreed requirements.
Vadodara Wedding Photography
Gujarati weddings often include multiple functions and meaningful family traditions.
Understanding the event schedule and the significance of important moments helps photographers anticipate rather than react.
Related article: Wedding Photography in Vadodara: Complete Guide for Couples.
20. Develop a Strong Groom Portrait Style
Groom portraits deserve the same attention given to bridal photography.
Good groom photography combines lighting, composition, styling and personality.
Experiment with environmental portraits, seated poses, confident standing compositions and candid interactions with friends or family.
Avoid relying on the same crossed-arm pose throughout the entire session.
Practical Tip
Look for locations that complement the groom’s clothing.
A simple wall, architectural corridor or softly lit window may create a stronger photograph than a crowded decorative background.
Related article: Groom Portrait Photography.
Part 5: Editing, Workflow and Professional Photography
21. Shoot RAW When Editing Flexibility Matters
RAW files generally preserve more sensor data and offer greater flexibility for adjustments than standard JPEG files.
This can be valuable when correcting exposure, white balance and colour.
However, RAW files are larger and require an appropriate editing workflow.
JPEG can still be suitable for assignments where rapid delivery and smaller file sizes are priorities.
Professional Advice
Understand your client’s deliverables and your own editing capacity before selecting a recording format.
For important wedding assignments, RAW capture is often a sensible choice.
22. Edit for Consistency, Not Just Dramatic Effects
Editing should improve the photograph without unnecessarily distracting from its subject.
Extreme contrast, excessive skin smoothing and inconsistent colour grading can reduce the quality of a complete wedding album.
A Practical Editing Workflow
Begin with exposure and white balance.
Correct important tonal issues.
Adjust colour carefully.
Apply lens corrections where appropriate.
Refine individual portraits.
Check consistency across the complete gallery.
Export using settings suitable for the intended use.
A photograph that looks impressive on Instagram may not necessarily reproduce well in a printed wedding album.
Always consider the final presentation.
23. Protect Your Photographs With a Reliable Backup Workflow
Data protection is one of the most important professional photography responsibilities.
A beautiful photograph has no value to the client if the file is lost before delivery.
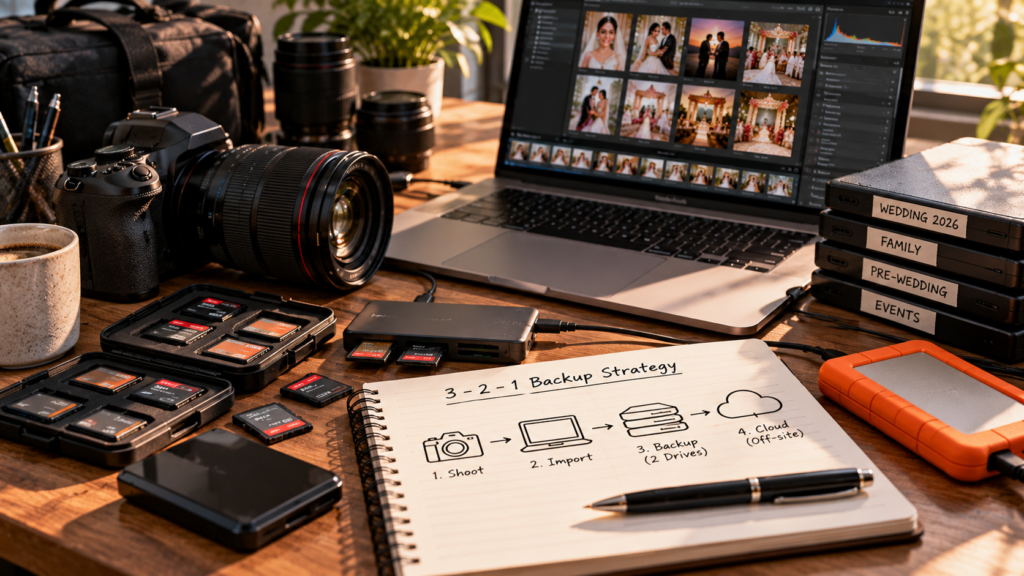
Use a structured backup system.
A commonly recommended approach is the 3-2-1 backup strategy:
Maintain at least three copies of important files, use two different storage devices or media, and keep one copy off-site.
After Every Assignment
Transfer photographs carefully.
Verify that files have copied successfully.
Create additional backups.
Keep original cards untouched until verification is complete.
Organise files using consistent folder names.
Do not depend on a single hard drive.
For practical troubleshooting, read our 15 Common Wedding Photography Problems and Solutions in Vadodara guide.
24. Learn How to Handle Photography Problems Professionally
Even experienced photographers encounter difficult situations.
A memory card may fail.
Lighting may change unexpectedly.
A client may request an unplanned group photograph.
Rain may interrupt an outdoor shoot.
The objective is not to assume that problems will never happen.
The objective is to prepare for them.
Professional Preparation Checklist
Carry charged spare batteries.
Bring reliable spare memory cards.
Inspect equipment before leaving.
Understand the event schedule.
Identify backup shooting positions.
Maintain clear communication with the client.
Have a contingency plan for essential equipment.
Preparation cannot eliminate every risk, but it can reduce the impact of many common problems.
25. Build Your Photography Style Through Practice and Review
The final photography tip is also one of the most important.
Improvement requires more than watching tutorials or purchasing equipment.
It requires deliberate practice.
Choose one skill at a time.
Spend a session practising natural light.
Then practise moving subjects.
Experiment with different compositions.
Review unsuccessful photographs and identify what caused the problem.
Compare your results over time.
Develop a Personal Photography Style
Study photographers whose work you admire, but avoid copying every composition.
Understand what makes their images effective.
Is it the light?
The colour?
The timing?
The connection between subjects?
Use those observations to develop your own visual approach.
A recognisable photography style grows from consistent creative decisions, not from applying the same preset to every photograph.
Photography Tips for Different Types of Photographers
Although the fundamentals are shared, different photography disciplines require different priorities.
| Photography type | Important skills |
|---|---|
| Wedding photography | Timing, lighting, storytelling, backup |
| Candid photography | Anticipation, autofocus, observation |
| Portrait photography | Posing, skin tones, subject comfort |
| Pre-wedding photography | Location planning, composition, natural light |
| Event photography | Fast reactions, exposure, coordination |
| Landscape photography | Composition, depth of field, timing |
| Product photography | Controlled lighting, detail, consistency |
| Street photography | Observation, timing, composition |
Beginners should first build confidence with exposure, focus and composition before investing heavily in specialised equipment.
Professionals should continue refining workflow, communication and consistency alongside creative skills.
Common Photography Mistakes to Avoid
Some mistakes appear repeatedly across different photography genres.
Using a shutter speed that is too slow.
Ignoring distracting backgrounds.
Choosing the widest aperture for every portrait.
Relying entirely on automatic settings without understanding their behaviour.
Overediting skin.
Failing to check focus during important moments.
Arriving without backup equipment.
And perhaps most importantly, concentrating so heavily on camera settings that meaningful moments are missed.
The strongest photographers learn to balance technical control with awareness of the people and environment around them.
Photography in Vadodara: Applying These Tips in Real Locations
Vadodara provides opportunities to practise a variety of photographic techniques.
Heritage surroundings can help photographers study architectural framing and symmetry.
Gardens can provide opportunities to explore natural light and environmental portraits.
Wedding venues can challenge photographers to manage artificial lighting, fast movement and crowded compositions.
Pre-wedding sessions can help develop posing and storytelling skills.
However, location selection should always account for current photography permissions, safety, weather and practical access.
Photographers planning a session can explore our guides to Best Pre Wedding Shoot Locations in Vadodara and Best Party Plots in Vadodara for Wedding.Nikon Learn & Explore
The important lesson is that a good location supports photography, but it does not replace strong photographic technique.
Frequently Asked Questions About Photography Tips
What are the most important photography tips for beginners?
Start by understanding aperture, shutter speed and ISO. Then practise accurate focus, simple composition and natural-light photography. Consistent practice is more valuable than learning complicated techniques all at once.
Which camera settings are best for professional photography?
There are no universal settings for every professional photograph. The correct combination depends on subject movement, lighting, depth of field and creative intention.
How can I make my photographs look more professional?
Pay attention to lighting, composition, focus, background selection and colour consistency. Clear communication with portrait subjects also makes a significant difference.
Is RAW better than JPEG for photography?
RAW generally offers greater editing flexibility, while JPEG produces smaller, immediately usable files. The best choice depends on your workflow and deliverables.
How do I improve wedding photography in low light?
Use an appropriate shutter speed, a sufficiently wide aperture and enough ISO to achieve a usable exposure. Add controlled lighting when necessary, and test autofocus performance before important moments.
How can I improve candid wedding photography?
Learn to anticipate expressions, understand the ceremony timeline, observe family interactions and position yourself where meaningful moments are likely to happen.
What is the best way to learn photography?
Combine technical learning with deliberate practice. Photograph different subjects, review mistakes and repeat exercises until camera operation becomes more intuitive.
Do I need an expensive camera to become a good photographer?
No. Better equipment can provide useful capabilities, but understanding light, composition, timing and subject interaction remains essential.
Final Thoughts: Better Photography Begins With Better Decisions
The most valuable photography tips are not always the most complicated.
Understanding how light changes a face, recognising the right moment, selecting an appropriate shutter speed and creating a comfortable environment for the subject can improve photographs significantly.
For beginners, the priority should be building a strong technical foundation.
For professional photographers, consistency, preparation, communication and file protection are equally important.
And for wedding photographers, the ultimate objective is to preserve meaningful moments while delivering photographs that remain valuable for years.
Whether you are photographing a wedding in Vadodara, creating portraits, planning a pre-wedding shoot or learning camera settings at home, the same principle applies:
Great photography comes from combining technical knowledge with observation, preparation and creative intention.
Keep practising, review your work carefully and develop a style that reflects how you see the world.